Getting started with automating network infrastructure requires a logical, step-by-step approach. You should start simple with a relevant use case and translate the process into a series of logical tasks. Then, you can build out integrations and surrounding processes to ensure it works with your infrastructure and meets your standards. Last, you will implement your tasks until the workflow is complete.

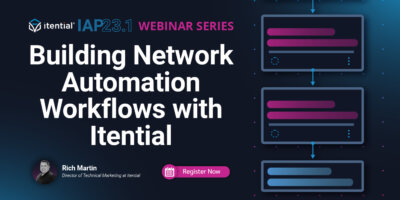
In the first part of the demo series on Building Network Automation Workflows with Itentiall, we “start simple” by identifying a common networking use case and leveraging Itential’s low-code, visual canvas to build a workflow that supports that use case. We define the logical steps of the workflow using “stub” tasks as placeholders, and then eventually replace those temporary stub tasks with active tasks to create an automation that’s ready to deploy.

In this demo, Rich Martin, Director of Technical Marketing at Itential, shows you step-by-step how to:

  • Stub out an initial workflow for a simple network automation.
  • Choose and configure tasks for CLI or API network solutions.
  • Generate and validate input for the workflow via a form.
  • Format and translate data between tasks using Data Transformations.
  • Run and test the workflow as part of the building process.
  • Demo Notes

    (So you can skip ahead, if you want.)

    00:00 Introduction & Demo Overview
    04:43 Create a New Automation Workflow
    07:35 Use a Task to Automate a Cisco CLI Show Command
    13:44 Use a Task to Automate a Cisco CLI Configuration Change
    18:51 Utilize Network Tasks for CLI or API Changes
    27:17 Create & Use a Form Task for User Input
    31:30 Create & Use a Data Transformation Task
    40:40 Update the Automation Workflow to Use Dynamic Variables
    44:25 Run the Completed Automation Workflow
    45:50 Troubleshoot Automation Steps in Job Manager
    46:50 Correct the Error & Test the Automation Workflow Successfully
    48:04 Using Stub Tasks to Lay Out Additional Steps in the Workflow
    53:22 Conclusion

  • View Transcript

    Rich Martin • 00:01

    Hello, everyone. My name is Rich Martin, Director of Technical Marketing at Itential, and thank you for tuning into today’s webinar, where we’re starting a new series, this is part one of a series, on how to build network automations, and we’re going to kick off things pretty simply, but hopefully they’re going to give you the framework to continue on building your own network automations and help you understand some of the foundations and fundamentals of working in the platform. So today we’re going to start with how to create logical steps for your use case. We’re going to start with how to create logical steps for your use case. So, let’s start with how to create logical steps for your use case. Um, a lot of times the first step is the hardest. So that’s what we’ll, we’ll, we’ll try to accomplish today is getting that first step done.

    Rich Martin • 00:35

    And again, this is a, uh, an overview of the series. Uh, part one is creating the logical steps. We’re actually going to, you know, build some things here, but we’re, we’re starting small. We’re starting with, with maybe the, the task at hand, and then we’ll think about adding more things in. So in part two, we’re going to add prechecks, post-checks and evaluations. We’ll talk a little bit about that today as well. Um, also we’ll do a deeper dive into integrations, how to bring things into the systems, uh, integrate their API so that they can be used in a workflow for other systems, whether they’re network or IT, IT systems, and then data transformations.

    Rich Martin • 01:09

    We’re going to lay the foundation of data transformation today. So in a simple way, so I can show you how that works, and then we’ll dig into it in part three, uh, in that part of the series. And then we’ll go eventually into building your, your own module or automation library and utilizing the libraries that, that we provide for our customers. And then, uh, finally, part five is, is concluding this journey we’re on, and it’s, it’s about publishing and sharing these automations. So once you’ve built them out, how do we incorporate more people using them, whether they’re on your team or even outside the team, maybe they’re end users doing self-service. For today’s demonstration, we’re going to be working in the IEtentional Automation Platform. We’re going to start with a blank canvas.

    Rich Martin • 01:52

    What I want you to think of it as is it shouldn’t be scary, it should be a whiteboard. As network engineers, we’re used to whiteboarding lots of things, and that’s the way you should start off here. This is a whiteboard. We’re going to stub out our workflow. We’ll start with simple things and then we’ll add more things. But then we’ll also take a look at how to choose and configure tasks to actually make network changes. You can look at your network as either something that’s traditionally driven by CLI management or maybe a more modern network solution that has some API that can be accessed directly. We can do both and we make it super simple in our platforms to be able to make changes on network devices using either of those methods.

    Rich Martin • 02:36

    We’ll take a look at how to choose those things and how to configure those things as well. Then we’ll also go into something around data gathering. This is always a process, so we’ll start with making a network change, but then we have to really think about where does that data come from. I want to introduce you to data gathering through a simplest use cases, a form that you would present to a user. and then how to validate that data and then how to translate that data using something we call a data transformation which helps you to manipulate the data to put it in a format that’s usable let’s say for making a network change and then through this whole process of iterating we’ll be running and testing the workflow so you’ll get a feel for what it looks like to build a workflow test it make changes those kind of things so on the right hand side we have our architecture just a basic architecture we’ll be working in the Itential automation platform The Itential Automation Platform also speaks to or talks to another part of our solution called Automation Gateway. This is a separate server or service that runs, and one of the main functions is to allow your CLI-driven devices to be able to be managed and automate, you know, to automate configuration changes, things like that on your CLI devices.

    Rich Martin • 03:52

    So we’ll be working with a Cisco device, but on the API side, you’ll see at the top here, we’ll be taking a look at Amazon Web Services, AWS. We’ll take a look at their APIs and some of the things that are available there that we can use, as well as Palo Alto Panorama. So if you’ve got a firewall, you know, a controller for your firewalls, and it’s Panorama or even something else, we can speak to that through an API. And so we’ll take a look at the different options, whether CLI or API. It all depends on what kind of network automation you’re building. So with that, let me share my screen and we’ll jump right into it. OK, so we start off in Automation Studio.

    Rich Martin • 04:31

    This is where we build workflows. We can take a look at existing workflows, modify them. And for today, we’re going to start with a brand new workflow. So I’m going to click this button for create. This is where we create a lot of the different assets and tools and features here. It defaults to workflow. I’m going to give it a name, create workflow.

    Rich Martin • 04:54

    That we’ll call it create. We’ll call it build a workflow one. How about that? That’s simple. All right. All right, so you’ll notice here that we’re on a blank canvas. Don’t let this scare you. We’re going to fill this out very, very quickly. So the first thing you’ll notice is on the left-hand side, we have this canvas. And basically, it’s a palette of all of the task.

    Rich Martin • 05:20

    A task is these boxes that can be dragged. They’re elements that can be dragged and dropped, and they’re kind of the steps of the workflow that we’re building. And you’ll see that they’re segmented out, identified by this is Automation Gateway Manager. So AG here stands for Automation Gateway Manager. We’ll be spending some time in there. But everything that either a tool or feature that exists inside the platform or in an integration or an adapter that’s been onboarded into the platform, we’ll have a section here. And all of the tasks that can be used to automate will be on the left-hand side.

    Rich Martin • 05:55

    Well, it actually can be on the right-hand side because we can move the palette around. But it will be in the palette itself, the task palette. So this is where we get all of our steps, so to speak. So, where do we want to start? A lot of times when we’re working with network engineers that are getting used to the platform, we start with the very basic thing. What is the device that you want to make a change to or execute a command on? A lot of times the very first thing that comes out is it’s some sort of CLI driven device because honestly, you probably have a lot of different devices or network solutions and different domains, network domains in your enterprise, your organization.

    Rich Martin • 06:34

    And some of those, maybe a great majority of those are CLI driven, but a lot of those are now becoming more front-ended with a controller. Think about SD-WAN, a controller, a director, or something like that, an orchestrator. You know, your wireless probably has a controller. And so, we can speak directly to a CLI driven device through Automation Gateway. Remember the last slide, that’s one of the big features of that. So, we can talk to Automation Gateway in our workflow and have it speak to a CLI device. But if it’s something that can be managed through an API, so if it’s a network solution that you log in through a web interface, there’s probably an API behind it.

    Rich Martin • 07:13

    It’s probably published and we most likely can integrate it into our system and then utilize those API tasks, those API methods in our workflow. So, where do we want to start? So, a lot of times it’s CLI. How do we do something with CLI? So, in our platform, we can do CLI in a wealth of different ways. We can use native tasks that are accessible through our Automation Gateway. So, if I’m going to make a change to a Cisco device, I can do that.

    Rich Martin • 07:43

    And with Cisco, I can search for Cisco iOS and Automation Gateway Manager will give us a list of matching tasks that I can start to do, I can start to use in an automation. And since we’re gonna start simple, I’m gonna look for just executing a command, not even making a configuration change for an iOS device. So that should be Cisco iOS and then iOS command. Cisco iOS, iOS command. If I drag and drop it into the workflow canvas here, then it becomes a step. Now, I have to do a couple of things first. I need to create some transitions between start and end, and I can simply do that by just dragging through these drag zones here.

    Rich Martin • 08:26

    Now, essentially, I’ve created a one-step automation workflow that can execute a command. But of course, we’re missing some things. If I double-click on this, this is going to expose all the variables that are necessary in order to execute a command. So off the top of your head, you kind of need two things, right? I need to know what the device is that I need to run a command on, and then I need the command to run. And so that’s what we’ll do here. So if I double-click this task, which came from Automation Gateway, this is more of a call we can use to directly execute a command on a Cisco CLI device or iOS device.

    Rich Martin • 09:05

    So we can just call this execute a command. So I can change the name of it so it’s a little more descriptive. X command on iOS device. Then looking closely here, you’ll see that there’s some variables that I have to fill out. They’re grouped here. Something called hosts and you want to pay attention to the variable types. This is asking for us to provide a variable, either statically or through some other previous task, and we’ll get to that in a minute. It’s needs it into the format of an array.

    Rich Martin • 09:37

    You need to know some basic general concepts of different variable types as they’re expressed in a JSON object. An array is a very simple in a JSON object. It’s these brackets along with, in this case, since it’s a string, and then I just need to give it the device name. Now, we’ve already onboarded a lot of these devices into our platform. We have federated inventory. This comes from Automation Gateway. It’s aware of our CLI devices.

    Rich Martin • 10:04

    This is a step that you would set up before you built any automations. I’m going to give it the name of the device that it’s recognized as. This is a Cisco iOS device. It’s actually virtual, it’s an AWS, but it’s CLI managed, so for our purposes, it works perfectly fine here. That’s one. I’ve given it the host name in an array, so I’ve given it into the format that it needs. If I scroll down here, you’ll also see I need an array of commands. These are the commands you would type in, and you can see you get a little more help here.

    Rich Martin • 10:35

    Give us a list of the commands you want to execute in the right order. and put it into an array, is what this is asking for. The little red asterisk here means it’s a required field. We could give it a list of commands. Again, if I’m using an array, it can be an array of one just like the host name, and I can just do a show version. I’ve statically given this one task to speak to a device. I’ve statically filled out two elements, two variables within the task by double-clicking it.

    Rich Martin • 11:14

    I’ve exposed that. I’ve looked at what’s required here. It’s an array. I’ve given it what it needs. It’s an array with a host name and it’s an array with the command that we want to execute. go. And so after that, I really everything else is optional. So if I close this, now I can save this. And we can actually run this and take a look at how it how it executes. So I’m, I’m taking the role of the network automation, you know, the network engineer automating everything or the network automation engineer. So I’m working strictly within the studio here, when you start to expose things out, you’re probably not going to run them from the studio, you’re going to run them from another place. But it makes it very useful to be able to iterate in and test and things like that, like we’re doing. So this was my first step, how do I do how do I automate something on a Cisco device or CLI device, and this could have easily been Junos or Arista EOS. Now, I’m taking a look as the job is executed. You’ll see the visualization is just like we saw in the workflow, but this is not the workflow canvas where I can modify things. This is the job actually being run.

    Rich Martin • 12:21

    When I hit the Run button, it executed. It made a copy of it, executed it, and it’s showing us executed. You’ll see here that this checkbox means it executed without any problems. Again, just like filling out a variable, once I’m in the job management side of things, if I double-click on a task, I can see the variables that were fed into it. So where did these variables come from? They came from what I just typed in, right? So I statically assigned these variables into this, into the workflow for this particular task, and that’s where these came from.

    Rich Martin • 12:53

    They were required in order to execute the task, right? So it needed to execute this command on this device. So when I look at the outgoing variables, this is the information that’s coming from the device, the task that was executed. And so you’ll notice here that it actually did a show version. I know this is kind of embedded in a JSON. Let me… Let’s see if that clears it up.

    Rich Martin • 13:16

    But you’ll see, we actually got a success for the standard output. And we see all of the data that was returned from the show. And so in the very simplest form, we just created an automation, a single-step automation, doing something non-destructive like doing a show version. And this is an easy way to get started and to feel comfortable about how the different features and elements work in our platform. So with that, let’s go back now. And now let’s move forward a step. And instead of executing an iOS command that’s more of a show command, let’s make a change to a device.

    Rich Martin • 13:52

    So again, if I can go back to my palette here, Automation Gateway Manager will give us the ability to do that. So you see this command here, cisco ios ios config. This allows us to make a config change. So it’s a different type of task, but it’s normalized in the sense that it’s just drag and drop. And I can delete and merge this, and I can drop this back in the middle to replace it. So now this is inline. And if I double-click it once again, I can change the name of this and I can say,

    Rich Martin • 14:28

    I can give it a more descriptive name, so that changes it there. Again, you’ll see it’s requiring some more variables. This case, we obviously need a host, so we can reuse what we did before. We’ll use that same device. It needs an array, and I need to put it as a string, so that’s what I’ve done. The array part is the brackets here, and the string is within the double quotes, and that’s just the name of the device that’s within our federated inventory. Then we need, what is the line of commands?

    Rich Martin • 15:05

    Similar to the commands we executed for the show in the last piece, this is now a config. Let’s now think through what we can do here to make a change on a device, kind of non-destructive. Maybe we want to figure out how to update the description on a port. To be completely safe, let’s do a loop back. This is all in testing. Obviously, this is all in our lab environment. But for you getting started, these are some of the things you might want to try as your first couple of steps. Let me pause right here and take you to Configuration Manager.

    Rich Martin • 15:36

    This is another part of our automation platform. It understands the federated inventory. It’s when we connect that automation gateway, we onboard all those CLI devices, they appear here. You’ll see here, this is the device that I did the show command on. I can actually load up the configuration. In Configuration Manager, we also build configuration templates. We can make backups of configs, create configuration templates, and do compliance reports from here.

    Rich Martin • 16:01

    This is a very useful tool, and I can do a lot of things from right here without having to actually jump into a CLI session or a secure shell session into the device. From here, I can pull the live config, and I can scroll down and take a look at what loopback interfaces are available. In this case, I’m going to use Loopback 301. We’re going to update the description here. Right now, it says, Hello Webinar. Let’s use that as our example. I’ve seen that. Let’s go back to our original iOS config here.

    Rich Martin • 16:36

    Now, we have an idea of what we want to put into the lines. Again, this is array and this is going to be the configuration lines that we want to automate and send over to that device. If I were doing this from the CLI, I would say interface loopback 301 and then the description. That’s exactly what we would put here, but we need to put it in the format that’s required. This is an array, so I just pasted this in. Again, our array are these brackets. Now, an array can have one or more elements in the array.

    Rich Martin • 17:07

    I have two elements in the array. These are the ordered set of commands based off of the directions here, the ordered set of commands that I want to run on this device. This is interface loopback 301 and then our description. In this case, I’m going to change it to Hello World. It was Hello Webinar and then we’ll do Hello World here. So close that and save it. And now if we run this, click Run, we’ll go back into our Job Manager.

    Rich Martin • 17:37

    It’s going to show this workflow running, our one step. We get the status here. So if I double click this again in Job Manager, it shows us the variables that were incoming. So the variables that we set for this task, remember, and I set these statically. I went in and we created this device, the host name, and then the actual config lines, and we put it into an array that was required. So then we see the outgoing, and we see now that this is completed. We see that these are the commands that were fed to it.

    Rich Martin • 18:13

    And then it says that it was changed, that there were updates made. And so this looks successful. And if we go back to Config Manager, I can refresh this, and we can pull the config down again, and then take a look at what the live config looks like once I pull it down and ensure that it made the change. I can use a search here, the loopback 301. And indeed, that one task allowed us to update the description to Hello World from Hello Webinar. So, that’s a great way to kind of get your footing here and your first steps into building, you know, mapping out your automation, what this needs to look like. Start simple.

    Rich Martin • 18:57

    What is the device I’m looking at making a configuration change on? Can I get that device? Do I want to run it? If it’s a CLI device, Automation Gateway Manager is going to give you a lot of the tasks that you need, so you can search for that particular network operating systems or vendor name, find it in Automation Gateway Manager, and then you can start to double-click it and go into the variables and start filling them out statically as the first part of your test. Is this going to work? Is this the way I need to feed this data into this particular task? That being said, there are lots of ways to make network changes. This is a CLI device, this is a Cisco iOS device, but Automation Gateway can also do different vendors.

    Rich Martin • 19:43

    We have access also to leveraging any automation scripting that you might already have. If you’ve got an Ansible playbook, if you’ve got a Python script or really any shell script that makes network changes. For instance, we typically have a NetMeco Python script that can create, delete, get interfaces, or even send commands themselves, or send configuration sets. I could just as easily use these assets instead. I can use a script, I can use native NetMeco, I can use these modules here to make a change on a Cisco iOS device. There are different ways to do it. I can leverage a Python script that we’ve already built, that can be onboarded in our system, and now it becomes a task just like anything else.

    Rich Martin • 20:33

    If I decided I didn’t want to use this particular task, I could detach it. And then I could drop, I don’t know, my Python script into here. And now I can use this to make a change to a network device. Of course, this is going to limit me to creating the interface. But the point is, we’re normalizing all of these different ways of automating CLI devices based off of, you know, what you have and flexibility and maybe all the automations you’ve already built, let’s reuse those. And they become drag and drop tasks onto our platform. That being said also.

    Rich Martin • 21:11

    A lot of your network solutions today are, like I said earlier, are going to be driven maybe behind a dashboard. You log into a web interface. It comes with some amount of automation SD-WAN. If you go in, you can push configs to devices, you can make changes from the web GUI. But there are also ways to automate those as well. Behind the dashboard, there’s typically an API. It’s definitely table stakes now that all of these things have APIs.

    Rich Martin • 21:40

    And so we can onboard those APIs in our system and then make those also tasks that are drag and drop tasks. So for instance, let’s take a look at AWS. A lot of network teams are doing more and more work in Amazon Web Services, especially around networking. So when you onboard AWS and its adapter into our system, you get access to all of these API calls that are drag and drop tasks. So a lot of them are like show commands, but a lot of them are create commands. So this is like a configuration change or creating something new. So in this case, we can create, we can do an AWS create route.

    Rich Martin • 22:19

    So let’s go down here. and we can say AWS create route. We can drag that onto our canvas. If I double-click it just like the CLI, it gives me a list of variables that it needs for me to fill out. If I’m creating an IPv4 route in AWS to be used in a routing table or in a VPC, these are the data that I may need to fill out in order to get that task to run, just like the CLI thing we just did. We want to normalize this. For AWS, this might facilitate reading a little of the documentation or understanding how the dashboard’s used so that you can understand what variables it’s asking for.

    Rich Martin • 23:04

    In this case, it gives us a really good description because these come from the API spec of exactly what it needs. But in the same way we just did something with CLI, you could do this with API. We could create a route in AWS, test it from here, define things statically, and learn how to make it work. That’s something cloud-based, but you may also have Panorama. And so we’ve onboarded Panorama here. And from Panorama, you might also similarly have something like a create route. Let’s see.

    Rich Martin • 23:40

    Let’s see here. Well, we can just use create a QoS interface. How about that? You could easily just do that. This is an API call into the Panorama application. If I double-click here, it has a series of variables as well. Now, not as descriptive. This would definitely require going into the Panorama documentation because they didn’t provide a lot of documentation in their API spec file.

    Rich Martin • 24:09

    But this would require some knowledge of their documentation. What is a query? It’s an object, but what does that actually need to look like in order to make an interface? There’d be a little bit of homework to do here to understand how Panorama wants you to pass variable and data to it in order to do something like create an interface. But those are two good examples of that. And if you think of it, these things can now be interchanged. And as you’re building out your automation, how you make a change to a device, whether it’s a CLI or an API, is just a step. It’s just another step.

    Rich Martin • 24:47

    And you can swap things out. Of course, the data that’s required for different tasks is going to change from system to system. But the idea of being able to swap a task out, make some changes, and now I can do something to make a change on a CLI device. I can now use the same type of workflow to make a change to something that’s API interfaced. So let me clean this up a bit. Let’s go back to, let’s see, I want to delete this, merge it back, and then drop this back in. Because let’s continue on with our workflow.

    Rich Martin • 25:22

    So we’ve statically made a change to a Cisco device. We’re going to continue to iterate over this. We just did something simple. We just updated the description on a loopback interface, something very low blast radius, good for testing. The question is, I had to fill out this data. So if I double-click the task, I had to fill this data out statically. Great for a first step.

    Rich Martin • 25:46

    But ideally, this data probably needs to come from some other place. The simplest place that it could come from would be asking the user. So if I save this automation and I use it, it’s really only good for one thing, changing the description on this device, on this loopback interface to this particular string. And that’s good for testing, but now we need to take the next step and make it more generally useful to other people. So maybe we want to now create a form that we can present to a user, right? And I call this gathering data. This is a part of the step of a process of steps where as you’re starting to build out more and more network automations and you’re adding more steps, you’re going to be able to say,

    Rich Martin • 26:32

    We’ve just accomplished automating a task change, right? A change in a network device as a task and a step. But then we’re gonna add more things to it. So one of the things is, where does this data come from? Other things could be pre-checks and post-checks, notifications, tickets, we’ll fill all that out. A little bit, we’ll stub all that out. But again, starting simple.

    Rich Martin • 26:53

    So the data has to come from somewhere. Let’s make it come from, it could come from an inventory system where we can get host names, but let’s just keep it simple. Let’s make a form we can present to the user. And now the user is going to be the source of the information that we will feed into this particular task to make a change. And by doing that, we can make it more generally useful to more people. So make a little room here. The first thing we want to do is I’m going to take another task here and I’m going to use Show JSON Forms.

    Rich Martin • 27:27

    I’m going to drop that into here. This is going to display a form, so when we run this automation, it’s going to display a form to the user, and then based off of the data from the form, it’s going to continue to use that information, and we can build the form within our platform here. I’m going to save this for the moment, and then I’m going to go over to this tab and create a new form, so I’m going to click Create. Instead of Workflow, I’m going to use JSON Form here. I’m going to call this Build a Workflow on Form. Create, and now we have a visual form creator here too. We can build the form visually just like we build an automation workflow visually, and when we’re finished with the form, that Show JSON Form task that I dragged onto the workflow, that’s what we’re going to use to show the form in the workflow.

    Rich Martin • 28:21

    But this is where we’re going to build the form, and then we’ll reference it in a minute. On the right-hand side, this is going to be a real simple form. I have several form elements. We can make very, very complex forms, even dynamic forms that can do API calls into different systems and populate dropdowns. But for keeping it simple in step 1 of the series, that’s what we’re going to do and keep it simple. The first thing I want to do is I’m going to drag a dropdown, and this particular dropdown is just going to be used. I can give it a new label, and I’m just going to say pick a network device basically.

    Rich Martin • 28:54

    Because it’s a drop-down, I need to give it some options to put in the drop-down. I’m going to statically assign these. We could dynamically assign them, like I could query an inventory and get a list of devices. But in this case, I’m going to keep it simple. This is the device we will be working on, but we could add in many more devices here. This is nice because this is a way to validate the input from the user. I can limit their choices to only the things I want to reveal to them, especially in a drop-down.

    Rich Martin • 29:27

    I just saved that. The second thing is, I’ll ask them for the port description to update it to. In that, I want to give them a free-form text field, and I’m going to call it interface description. I’ll save that. So now I have our two elements in our form, we’ll keep it that simple. This is the data then is, at least this subset of the data is going to come from the user and not from a statically assigning it in that task, but we will reference it from the task. So if I click this button, Preview JSON Form, it’s going to actually show me the form I just built so I can test this out.

    Rich Martin • 30:12

    And then we can also go change this back to Hello Webinar. This is what the form will look like when it’s presented to a user who’s going to execute the automation. But I want to click here to show form data because this is going to give us the data that the form is going to output that basically are going to become the variables that we’re going to use for that IOS config task. So this would provide us the host name and the interface description, right? So this is the data that’s going to be given back to us when this form is executed. Assuming that I entered these things into the form, this is what gets back to us. And this is what we will use to now feed into the Cisco IOS configuration task.

    Rich Martin • 31:00

    But notice on its own, we can’t use this data. We actually have to do something with it. We have to transform it. We have to do something in order to put it in the right format for that IOS task. And that’s what I did manually through static means when I statically filled these things out. Now we want to do this more programmatically through another step, another task. And we use the task.

    Rich Martin • 31:24

    We call this transformations. So we built this. I’m going to keep this here. And I’m going to take us to building a transformation. Before I do that, let’s go back to our workflow here because I think this illustrates this a little bit better. So our first step, show a form. If I double-click this.

    Rich Martin • 31:44

    It’s going to ask us for the form ID string. We’ll fill all that out later. But I’m just going to change the title of it, get input from user. So that’s the name of this task, get input from user. The user is going to fill that form out. And ideally, we would love to be able to take those variables directly into here and then reference those variables here. But unfortunately, the way that API calls, and this is just the way API calls work between different systems, the data has to be manipulated and changed in order for it to go from this step to this step.

    Rich Martin • 32:19

    And so we need to have a transition step here, which transforms the data. And so that’s what we’re going to use. Part of our workflow engine palette here is a transformation task. So it’s going to take the data as input from our form into the transformation task. We’re going to manipulate it and put it in a format that now is acceptable to this task here. So this is our transformation. So now let me go back, let me save this, and let me go back to this tab where we can create a new transformation.

    Rich Martin • 32:53

    So I’m going to call this build a workflow. Great. OK, again, another drag and drop canvas here that we have access to. It may look confusing at first, but I want to walk you through this. This gives you the foundations of the transformation. So hopefully you understand what the purpose of the transformation is. I have form data.

    Rich Martin • 33:19

    That data, when the user fills that out, I want to take that data and put it in a format that can be used by that task that makes the change to the Cisco iOS device. And so we need to format that data in a way that makes that acceptable to that. And that’s what the transformation is for. So the first thing we want to do is create an incoming schema. So if I click Incoming Schema here, it’s going to take me to another window. So remember, when I showed you the form preview, I can copy this to the clipboard. This is a JSON object that gets returned.

    Rich Martin • 33:56

    And this is a great shortcut, because now I can go into my transformation, building the schema, and I can paste it directly into here. And I can infer the schema. So it builds the schema for me based off of the data that comes back from the form, the example data that I have here. So now it identifies, OK, this is what the schema ought to look like. And really, the only thing I need to put in here now is a unique ID. So I just need to call it something unique for this transformation. So I’m just going to call it form data, because that’s what it is.

    Rich Martin • 34:27

    It’s data that came from the user form. So if I save it, now we have a schema. So the form that the user fills out is going to now provide this network device variable and this description variable that now I can use and manipulate in ways so that I can give it to the outgoing schema so I can map it to an outgoing schema that can be used as variables for the Cisco iOS configuration changes we want to make. to make. So recall, so if I go back to our original workflow here, and if I double-click this, recall there’s really two elements to this that we need to provide in our transformation task. We need to give it a host name in an array format, and we also need to give it the command list in array format. So let’s work on the first piece, the host name in the array format.

    Rich Martin • 35:17

    So the host name is going to come from the network device that gets selected. But it has to be, but see this is a string, so it has to be an array in order for it to be acceptable to that task. So this is where the transformation kind of helps fill the gaps between these two, any two tasks on the canvas, so that we can manipulate that data so it works. So the first thing I want to do is I’ll create a new outgoing variable. And this I’m just going to call host name. And I’m just going to give it a type array because ultimately that’s the type that needs to be fed into that that Cisco iOS Configuration task so I call it array and so I can’t map a the string directly into array I need to do some other method to turn it into an array and so hope and ideally this is very simple If I go to here, I have all of these different methods available.

    Rich Martin • 36:12

    And we’ll deep dive into this when we get into the transformation section of the series. But I can create a new array here. And once I’m familiar with this task, I can just feed it a string, and it’s going to turn it into an array. So I’m just going to map that into the first element of the array. And then I can turn it into the host name. It turns it into an array, and now I can map it directly to the host name. So it did a bit of data manipulation.

    Rich Martin • 36:36

    It took a string, turned it into an array. And now it’s acceptable for that iOS. Let’s just go change task. Now, let’s go to interface description. So this is a little different. We have to, again, do an array, because the format that’s required is an array. And the first, so let’s go back to our iOS device here.

    Rich Martin • 36:57

    We’re looking at the variables. Since we statically assigned it, we’ve got the array. It’s going to create the array. Now, what are the elements of the array? It’s got to be the interface loopback 301, and then the description, plus the name from the form, the value from the form. So that helps us. So the first thing I need to do, the first element in the array should be interface loopback 301.

    Rich Martin • 37:18

    And I’m going to statically make that the only thing that can be set here. So I’m going to create a new string. And I can drop it right here. And I can put interface loopback 301. and then map it into the array as the first element of the array. That completes the first element array. Now, it would be great if I could do this.

    Rich Martin • 37:47

    Whatever the user enters as the description, I can put in the second element of the array. Let’s do that for a moment because this shows you the iteration and testing you can do. Let’s map those two elements of the array. Now, I just need to add the outgoing schema that this is going to map to. If I basically do the same thing, I call this iOS commands. That’s the ID, unique ID, and this is also an array. Save that.

    Rich Martin • 38:15

    Now it’s created that schema, and now I can map this over. All right, save this. And the cool thing here is I can test this. I can iterate over this. And you’ll be doing this as you build more transformations, especially more complex transformations. So if I run this, it’s going to take the data, the example data that was part of this input schema, and it’s going to use that as if somebody filled out the form and passed these variables. And it’s going to tell us what it ultimately maps to on the right-hand side of our outgoing schema after doing all of these methods.

    Rich Martin • 38:47

    So the host name, which is here, comes back as an array. Notice the array here. That’s cool. That works. And it comes with a host name. That’s perfect. But now look at the iOS commands.

    Rich Martin • 38:57

    It does have the array. The first element is correct, interface loopback 301. However, hello webinar is not going to make that port description work when we pass that as a CLI command. We need to have the word description space in front of it. So in order to do that, we need to take a step back and add another method in here. And so as you get used to these, this is pretty standard stuff. These string, we know we need to manipulate a string.

    Rich Martin • 39:26

    So if I’m looking through the menu of all the things I can do, concat or concatenation is really what I want here. And what that does is it basically glues two strings together. So the first part of the string needs to be description. really description space that I can statically assign into here. Now, what do I want to paste into the end of it? Now, I want to paste whatever the user typed in on the form, and that’s going to be the second piece. Now, I can map this to my element, and that should complete the requirements for the variables passing back to that iOS command.

    Rich Martin • 40:07

    Let’s run it and test it to make sure. So the only thing changed, everything looks the same, except now we have this description in front of the Hello Webinar. So the hello webinar came from the form, as an example. But notice that that’s how I inserted description before I used this concat method, which came from the string here. So that looks really good. So again, I’ll save it. And now that we’ve built it and we’ve tested it here, we can go back to our automation.

    Rich Martin • 40:34

    We’ve created our form. Now we can start modifying this and making it not statically assigned, but more pointing to the different assets we created, and then leveraging those variables in this final task where it’s making the change. So let’s start with the form. We need to reference the form that we built a step earlier. So all I need here is the name, which comes from here, build a workflow form. So this is what it’s asking for, the name or the idea of the form. And that’s really it.

    Rich Martin • 41:06

    It’s going to ask for instance data. This is a feature where you can have it pre-populate some default values for your form. We don’t want any. So it’s asking for an object. It’s required. So if I can give it an empty object, which is in JSON just two curly braces, open and close, that will fulfill the requirements for the form. So now we have the form referencing in our workflow step, referencing the form we created.

    Rich Martin • 41:30

    Now let’s talk about the transformation. So we created that transformation, and we called it build a workflow run transformation. So this is what we called it. Thank you. So because if we go back just quickly, we created an incoming schema. So when I referenced this in that step, when I referenced this transformation, it knows about the incoming schema and the outgoing schema because it read that. So now it’s asking us, the incoming schema has something called form data.

    Rich Martin • 42:02

    Where does that come from? Where does that data come from? And previously for testing, we could statically assign it. But really, that data comes from this form. So instead of statically assigning here, I can reference a previous task by clicking this button. And now it’s going to ask me which previous task, get input from the user. that’s going to feed that output into the input here.

    Rich Martin • 42:25

    And then what’s the variable? In this case, it’s called export. It’s the only one outside of error, and it’s not error, it’s export. So that now ties, that forms output when somebody fills it out and feeds it into the transformation. So now it has that incoming schema, the data for the incoming schema. And it’s going to do a transformation and then have output variables. And similarly, now, if I double click here on the iOS device, we can reference the variables that are coming out of the transformation, because that’s its purpose.

    Rich Martin • 42:55

    It’s going to transform the data from the form into a format we can use for this step to make the actual change. So instead of defining these statically, Now, I can also reference a previous task. But instead of referencing the show JSON form task, we really need to reference the transformation task, because that’s the data in the right format. So build a workflow for one transformation is this task, and now it’s asking me the variable. This is where it identifies the outgoing schema. So I called this host name to make it simple.

    Rich Martin • 43:25

    So this is host, so that matches that. And the only other thing here is similarly, what are the line, the configuration lines that we’re going to feed to it? They also should come from that same task, the transformation task. And now, instead of that, we have our second output schema entry, get user. I’m sorry, we’re going to reference that transformation. And now we’ll see our second outgoing schema that we created, iOS commands. So this should hold the commands.

    Rich Martin • 43:50

    Remember, we did the concatenation and turned it into an array and all that. So that should hold the commands now that we will now pass into this task to actually make the change. So let’s give it a shot. We filled this out. Now it’s more dynamic and more generally usable because there’s a form in front of it that can ask certain information. And now, instead of doing one thing on one device for one interface with only a static description, we’ve created an automation that can be used by your network team to do this kind of work and give them some free form ability to select devices and port descriptions. So we can test that from here.

    Rich Martin • 44:28

    We can run. And now the first step you’ll see here as it’s running is show JSON form. This is going to stop because it really needs us to input the form from the user. So if I go down here, this is a list of the tasks as they run. So the start has completed, but now we’re on the second step here, which is the show JSON form, get input from user. If I click on work, that’s going to bring up the task form. And remember, we created this just a moment ago.

    Rich Martin • 44:57

    So we’re going to fill out the same device we’ve been working on. And in here we can enter the task. Ask again. Let’s do hello everyone. Hello world or hello webinar. I’m going to confirm that. So now it’s going to go pass that data to the transformation task.

    Rich Martin • 45:18

    We can double-click the transformation task and take a look at the incoming variables. It’ll be easier to look if I look at it in this view. Notice that from the form data, this is what we passed into the form. It got passed into the variable on the input. And now in the outgoing, this should look very familiar because this is what we tested against when we created the transformation. We get the host name, which is the host name in an array format, and then the iOS commands, which is that list of commands. And notice it says, hello, everyone here.

    Rich Martin • 45:49

    So this is in the right format. And so we’ll take a look at our last step in the workflow here. We’re actually making the change to the iOS device. If I click here, the incoming variables that it was passed because we referenced them from the transformation were the outgoing variables from the transformation. And then the outgoing from here is when it executed the task, what was the result? And you’ll see the result here. Let’s see.

    Rich Martin • 46:16

    It did an execution. Let’s see. It had an invalid input here. Let’s see what it was. Oh, I misspelled interface. How about that? So let’s correct that real quick, and we’ll rerun it.

    Rich Martin • 46:33

    So this is a great way of showing how to determine what the error was. So I went to the module error, and I looked, ah, interface, that’s wrong. So where was that at? That was within our transformation task. So let’s go to our transformation automation, and see if I go right here, I misspelled that. So now I have interface. Save it.

    Rich Martin • 46:58

    We can actually test it again. I should have caught that in my test. Run. OK, now interface is correct. OK, now let’s go back to Automation Studio. Let’s run it again. All right, now we can work our form.

    Rich Martin • 47:21

    Select a device, we’ll select the same device. Hello, everyone. Permit. Transformation, now it’s making the change, so it’s trying to execute the series of changes. We’ll go straight to here, take a look at the details and the outgoing. We have our interface there, and yeah, it was changed this time. We got a success. Here are the updates that were made and the status is success.

    Rich Martin • 47:48

    So there we go. We did a little troubleshooting as well. That happens often. This is why we test and we do all these things. So hopefully that gives you a great foundation for how you would work in the platform this way. So finally, let’s go back to our task and let’s round this thing out and finish it off. Let’s start stubbing out the rest of what this workflow looks like, at least ideally as we want to continue to work on it, right? So there’s a couple of things we could do. When I say stub out, I literally mean that because we have a task here called stub, a stub task.

    Rich Martin • 48:20

    And I’m just going to drag and drop that in because we’re going to use that quite a bit. So the first thing I can do is I can say, OK, this helped me build maybe the core of the automation that I want to do. We took something that made a static change. We made it generally more useful with a form and a transformation. But you know what? In the real world, before I actually make a change, I probably want to do a pre-check and a post-check, right? I want to do some sort of validation that the network state, it looks good before I make a change, regardless of what the change is.

    Rich Martin • 48:52

    So we can do that by extending our workflow and adding more things into the workflow itself. So I’m going to use the spread tasks, kind of space this out. I know this looks a little weird here at first, but trust me, I can be zoom it here. I spaced that out because the stub task allows me to now just think of it as a place holder. So I can change the name to go pre-check process. And if I wanted to test and run this, I would select success here because you can actually have an error and stop the workflow or take an error path if you wanted to. But I like to use success here. And then I can say, OK, where would I normally have this? I would probably have this before I make a change, right?

    Rich Martin • 49:38

    So I can just drop it into there. And since I’m kind of mocking this whole thing up like a whiteboard, let me zoom in a bit more here. I can copy and paste this as well, double click it and call this post check. And so if I do a pre-check, probably want to do a post-check after we’re done. So I can drop it into the line here. What else can I do? Well, maybe I could do something like gather data from an inventory system and not ask the user for which network device. So I could say query, change name here, query inventory.

    Rich Martin • 50:30

    So maybe I want a step, that query is an inventory system that I have. It could be your CMDB, it could be Netbox, something like that. So maybe I want to put that in there as a step. What else could we do? Oh, another common one is this. Update change request ticket. Maybe you have service now, maybe you have JIRA, maybe you have something else.

    Rich Martin • 50:59

    We should have a step in here to update some tickets. Maybe I do that at the very beginning. Actually, what if I do that? What if we move some stuff around? I do that maybe right before I make a change, and then maybe I do it right after I make the change. So I can update a ticket or even create a new ticket, and then put the details of the current config that I’m about to change in there, and then put the details of the change that I actually made in there to update the documentation. See, now I’m starting to think less about the core task of automating the network change, and now I’m starting to build the process in that I would normally.

    Rich Martin • 51:44

    Think about it, these are manual tasks that you would do, manual steps that you would normally have to do. Once you get beyond automating the task and the changes, whether they’re CLI or API, now you can start thinking about, okay, what is the other step in the process, the pre-check and post-check? Then that’s where we’re going to continue on in our series, is going and filling out these tasks and filling out this automation. So it’s not just making a single change, but maybe it’s making multiple changes, maybe it’s integrating with all kinds of systems, maybe it’s service now, updating tickets, maybe that’s part of your process you want to automate. All of these things can be automated as part of your network change process. And so starting with the core, and then moving out from there, adding these things in as stubs, and one of the things you could do is you could say, hey, everything that’s a stub, maybe I move it out and focus on one thing at a time. This is where you have a lot of flexibility, it’s your whiteboard.

    Rich Martin • 52:46

    Maybe I’m saying, here’s the core things that I’ve configured, what’s my next thing I want to do? Probably pre-check, post-check process. This is what I’m going to work on next. Once I’ve gone through the tool set here, figured out the logic and the correct tasks from the palette that I want to use, then I replace the stub with the actual process and then I work on the post-check. And we’ll start to do that in our next webinar episodes in these series until finally we’ve built out this whole thing step-by-step using the different tools and integrations and transformations that we have available so that you have a fully functioning end-to-end workflow. And I just want to say thank you very much. Tune in again for the further episodes where we will continue to build out this workflow and turn it into something fully functional end-to-end according to your processes and hopefully something that not only you and your team can use, but when we’re done with it, this could be exposed in self-service, or even leveraged as part of another application, could be CICD, could be integrated into self-service through ServiceNow or any number of ways so that you can increase participation of who has access and who can use these automations.

    Rich Martin • 54:04

    So with that, thank you very much. We look forward to seeing you again on the next webinar. Goodbye.